The Ultimate Classic Homemade Banana Pudding: A Step-by-Step Guide to the Perfect Southern Dessert
The Master Recipe: Step-by-Step Instructions
Now, let us walk through the assembly process, focusing on the techniques that make a truly exceptional banana pudding.
Step 1: Preparing the Pudding Base
In a large mixing bowl, combine the instant vanilla pudding mix and the 3 cups of cold milk. Using a wire whisk, beat the mixture vigorously for about two minutes, or until it begins to thicken. It will still be somewhat liquid at this stage, but it should have lost its initial powdery texture.
Step 2: Adding the Secret Ingredients
Add the sweetened condensed milk and the vanilla extract to the bowl. Whisk continuously until the mixture is completely smooth and homogeneous. The condensed milk will darken the mixture slightly, giving it a rich, custard-like hue. It will also significantly thicken the pudding base.
Step 3: The Art of Folding
Take the thawed whipped topping and add it to the pudding mixture. Here, you must employ the technique of “folding” rather than whisking. Using a silicone spatula, gently cut down through the center of the mixture, sweep across the bottom, and fold the mixture over itself. Rotate the bowl a quarter turn and repeat. This process incorporates the whipped topping without deflating the air bubbles that give it volume. Fold until no white streaks remain.
Step 4: The Foundation of the Layers
Choose a large, clear glass serving dish (such as a trifle bowl or a 9×13 inch glass baking dish). A clear dish is highly recommended because the visual appeal of the layers is a huge part of the banana pudding experience. Begin by arranging a single, flat layer of vanilla wafers across the bottom of the dish.
Step 5: Building the Layers
This is where the magic happens. Lay the sliced bananas over the cookies in a single, even layer. Follow this with a generous layer of the pudding mixture, spreading it evenly with a spatula. Ensure the bananas are completely covered to prevent them from browning. Repeat this process: a layer of wafers, a layer of bananas, and a layer of pudding. Continue until all ingredients are used, ensuring that your final layer is a thick, beautiful layer of pudding.
Step 6: The Critical Resting Period
Cover the dish tightly with plastic wrap. It is important to press the plastic wrap gently against the surface of the pudding to prevent a skin from forming. Place the dish in the refrigerator and allow it to chill for at least 4 hours. For the absolute best results, allow it to chill overnight. This resting period is not just about cooling the dessert; it is a vital chemical process where the cookies soften, the flavors marry, and the pudding sets to perfection.
Step 7: The Final Touches
Just before serving, remove the pudding from the refrigerator. In a small bowl or zip-top bag, crush a handful of vanilla wafers into coarse crumbs. You can also add a few extra banana slices on top for a fresh pop of color. Sprinkle the crushed cookies over the top of the whipped topping. Serve immediately.
The Science of Resting: Why Overnight is Best
The instruction to refrigerate the banana pudding for at least four hours, preferably overnight, is perhaps the most important step in the recipe. This resting period is where the actual transformation occurs.
Hydration of the Cookies: The wafers act as a sponge, absorbing the moisture from the pudding and the banana juices. They transition from a crisp, crunchy state to a soft, cake-like texture that melts in your mouth.
Flavor Integration: The vanilla from the pudding, the sweetness of the condensed milk, and the natural flavor of the bananas need time to meld together. The flavors literally “marry” in the refrigerator, becoming more complex and cohesive.
Stabilization of the Pudding: The instant pudding continues to set and stabilize, ensuring that when you scoop it, it holds its shape rather than running all over the plate.
Serving and Presentation
Presentation is key to the ultimate banana pudding experience.
The Glass Bowl: As mentioned, serving the pudding in a clear glass bowl allows the beautiful layers to be seen. It is an appetizing visual tease that builds anticipation.
The Slices: When serving, cut cleanly through the layers with a large spoon or a serving knife. Try to get a bit of every layer—the softened cookies, the bananas, the pudding, and the fluffy topping—in every bite.
The Garnish: A sprinkle of crushed wafers right before serving provides a needed crunch, while a sprig of mint adds a touch of color and freshness.
The Debate: Instant vs. Cooked Pudding
While the recipe provided uses instant pudding, a fierce debate rages in the culinary world regarding the “authentic” way to make banana pudding.
The Case for Instant Pudding
Instant pudding is the modern convenience standard. It creates a stable, creamy base that holds up beautifully in a layered dessert. It is virtually foolproof, making it ideal for beginners and large gatherings where reliability is key. The addition of sweetened condensed milk in this recipe elevates the instant pudding, masking any “boxed” flavor and giving it a rich, homemade taste.
The Case for Cooked Custard
Purists argue that true banana pudding must be made with a cooked custard. This involves heating milk, sugar, egg yolks, and cornstarch on the stovetop until thick and creamy. The result is a dessert with a deeper, more complex flavor and a silkier texture. However, a cooked custard requires careful temperature control to avoid scrambling the eggs, and it takes significantly more time to prepare.
Both methods have their place. The instant version is perfect for a quick weeknight treat or a busy holiday prep, while the cooked version is a labor of love for a special occasion.
Variations and Creative Twists
While the classic recipe is hard to beat, there is plenty of room for creativity.
The “From Scratch” Purist Version
If you have the time and want to elevate the dish, you can make the pudding from scratch. A classic pastry cream (crème pâtissière) made with egg yolks, sugar, cornstarch, milk, and vanilla is significantly richer and more flavorful than instant pudding. If you choose this route, you will need to cook the custard on the stovetop until thick, let it cool, and then fold in whipped cream.
The Meringue Topping
Instead of whipped topping, you can top the pudding with a homemade meringue. Whip egg whites with sugar until stiff peaks form, spread over the pudding, and bake at 350°F for 10-15 minutes until golden brown. This is a traditional, stunning presentation.
Flavor Additions
Peanut Butter: Fold a half-cup of creamy peanut butter into the pudding mixture for a delicious peanut butter and banana flavor combination.
Chocolate: Use chocolate instant pudding mix or add chocolate chips to the layers for a chocolate banana pudding.
Coconut: Add a layer of toasted coconut between the bananas for a tropical twist.
Caramel: Drizzle a small amount of caramel sauce over the wafers before adding the bananas.
Bourbon: For an adult version, add a tablespoon of good-quality bourbon to the pudding mixture. The smoky, oaky notes of the bourbon pair beautifully with the sweetness of the bananas and vanilla.
Alternative Cookies
While vanilla wafers are the gold standard, you can experiment with other cookies. Shortbread cookies offer a buttery richness, while graham crackers provide a honeyed, slightly toasted flavor. Biscoff cookies would add a deep, caramelized spice note that would complement the bananas wonderfully.
Common Mistakes to Avoid
To ensure your banana pudding turns out perfectly, avoid these common pitfalls:
1. Using Unripe Bananas
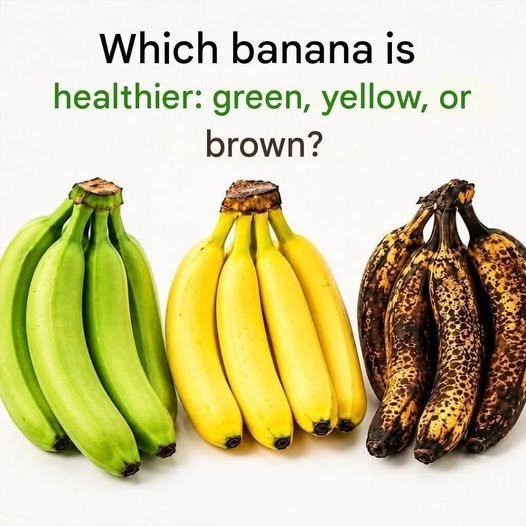
The dessert will lack flavor if the bananas are not ripe. Ensure they have a bit of a sweet aroma and are soft to the touch. If your bananas are slightly underripe, you can place them in a brown paper bag for a day or two to speed up the ripening process.
2. Not Whisking Enough
The pudding mixture must be whisked thoroughly to prevent lumps. Whisk until the mixture is smooth and consistent. Whisking also helps the milk hydrate the starch granules in the pudding mix, ensuring a smooth final texture.
3. Skipping the Resting Period
If you serve the pudding immediately, the cookies will be hard, and the flavors will be flat. The resting period is non-negotiable. The magic of banana pudding happens in the refrigerator.
4. Overfolding the Whipped Topping
If you stir the whipped topping into the pudding mixture too vigorously, you will deflate it, resulting in a dense, heavy pudding. Fold gently. Use a spatula and a light touch, scraping the bottom of the bowl and folding the mixture over itself.
5. Overcrowding the Dish
If you put too many wafers or bananas in the dish, the pudding will not have enough room to settle. You want a good ratio of pudding to cookies and bananas. The pudding is the star, so let it shine.
Storage and Food Safety
Because banana pudding contains dairy and fresh fruit, proper storage is essential.
Refrigeration: Store the banana pudding in the refrigerator, tightly covered, for up to 3 to 4 days. However, it is at its absolute best within the first 24 hours. After a couple of days, the bananas will begin to break down and release more moisture, causing the pudding to become watery.
Freezing: It is not recommended to freeze banana pudding. The freezing and thawing process will cause the bananas to become mushy and the pudding to separate. The texture will be irreparably damaged.
Food Safety: Do not leave banana pudding at room temperature for more than two hours. The dairy components are prone to bacterial growth if left in the “danger zone” of 40°F to 140°F for extended periods.
The Cultural Impact of Banana Pudding
Banana pudding is more than just a recipe; it is a cultural artifact. In the American South, it is a staple at church potlucks, family reunions, and holiday dinners. It is a dish that signifies hospitality, comfort, and a connection to the past.
There are entire festivals dedicated to banana pudding. In the South, debates over who makes the best banana pudding can be as fierce as debates over barbecue. It is a dish that evokes memories of grandmothers in aprons, the scent of vanilla wafting through the house, and the simple joy of a shared dessert.
The image of the classic bowl, with its perfect layers and generous topping, is a powerful symbol of this cultural heritage. It is a reminder that the most beloved dishes are often the simplest, prepared with love and shared with joy.