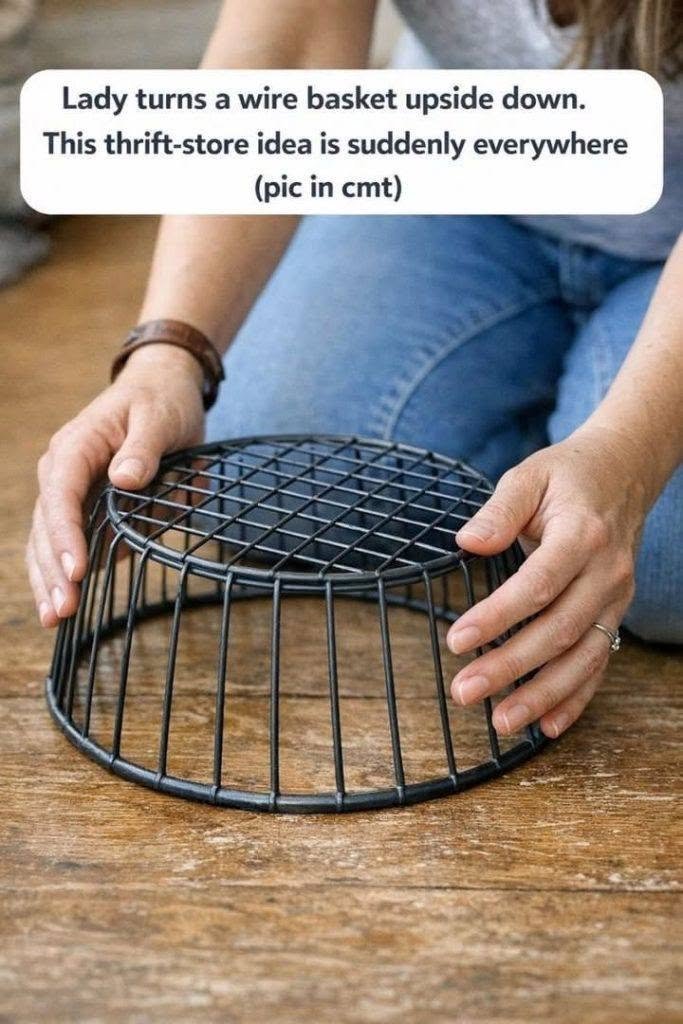
How to Turn an Upside-Down Wire Basket Into a Chic Side Table
Thrift stores are full of hidden treasures waiting to be transformed. One of the most popular DIY trends right now involves taking an ordinary wire basket, turning it upside down, and creating a stylish side table that looks like it came from a high-end boutique. This simple project requires minimal supplies, costs very little, and can be customized to match any home decor. Here is how you can create your own chic side table using a thrifted wire basket.
Materials You Will Need
To complete this project, you will need a wire basket. Look for one with a sturdy frame and a flat bottom, as this will become the top of your table. A round or square basket works well. You will also need a circular piece of wood or a wooden cutting board that is slightly larger than the base of the basket. This will serve as the tabletop. For the finishing touches, you will need a can of spray paint in your chosen color, a hot glue gun or strong adhesive, and optional felt pads for the bottom of the basket to protect your floors.
Step 1: Prepare the Basket
Start by cleaning your thrifted wire basket thoroughly. Remove any dust, dirt, or stickers. If the basket has a handle, you can either leave it on for a rustic look or remove it with wire cutters for a cleaner, more modern appearance. Once cleaned, turn the basket upside down so the flat bottom is facing up. This will be the surface where you attach the tabletop.
Step 2: Paint the Basket and Wood
Choose a spray paint color that complements your home decor. Matte black, gold, or white are all popular choices. In a well-ventilated area, apply two to three thin coats of spray paint to the basket, allowing each coat to dry completely before applying the next. While the basket dries, paint the wooden round or cutting board in a matching or contrasting color. Let both pieces dry fully.
Step 3: Attach the Tabletop
Once the paint is completely dry, apply a generous amount of hot glue or strong adhesive to the bottom of the upside-down basket. Carefully center the wooden round on top of the basket and press down firmly. Hold it in place for a few minutes to ensure a strong bond. If you are using a heavy wooden top, you may want to reinforce it with small screws or brackets for extra stability.
Step 4: Add Finishing Touches
To protect your floors from scratches, attach felt pads to the bottom edges of the basket. You can also add a decorative knob or handle to the top of the table for a touch of elegance. If you want a more polished look, you can apply a coat of clear sealant to the wooden top to protect it from spills and wear.
Styling Your New Side Table
Your new side table is now ready to use. Place it next to your sofa or favorite armchair. It is perfect for holding a lamp, a cup of coffee, or a small vase of flowers. Because it is lightweight, you can easily move it from room to room as needed. This upcycled piece adds a unique, personal touch to your home and is a great conversation starter.
Why This DIY Trend Is So Popular
This project has become a favorite among DIY enthusiasts because it is affordable, eco-friendly, and incredibly versatile. It allows you to repurpose an item that might otherwise be discarded and turn it into something beautiful and functional. Whether you prefer a minimalist, industrial, or bohemian style, you can adapt this project to suit your taste. With just a little time and creativity, you can transform a simple wire basket into a stunning piece of furniture.