How to Reuse Old, Chipped Plates: Brilliant Upcycling Ideas You’ll Love
There is a special kind of heartbreak that comes with dropping a beloved piece of dinnerware. Whether it is a vintage floral plate inherited from a grandmother, a beautiful stoneware dish from a memorable trip, or simply a well-loved piece of your everyday set, the moment you see that first chip, the item is permanently altered. Most people, upon discovering a chip along the rim or a crack in the glaze, immediately toss the plate into the trash bin, assuming its useful life is over. After all, eating off a chipped plate is a hazard—it can harbor bacteria and cut your lip.
But throwing these pieces away is a massive waste of beautiful design, sentimental value, and raw material. Ceramics and porcelain take an immense amount of energy to produce, and because they are fired at incredibly high temperatures, they are virtually indestructible in a landfill. They cannot be easily recycled in standard municipal bins.
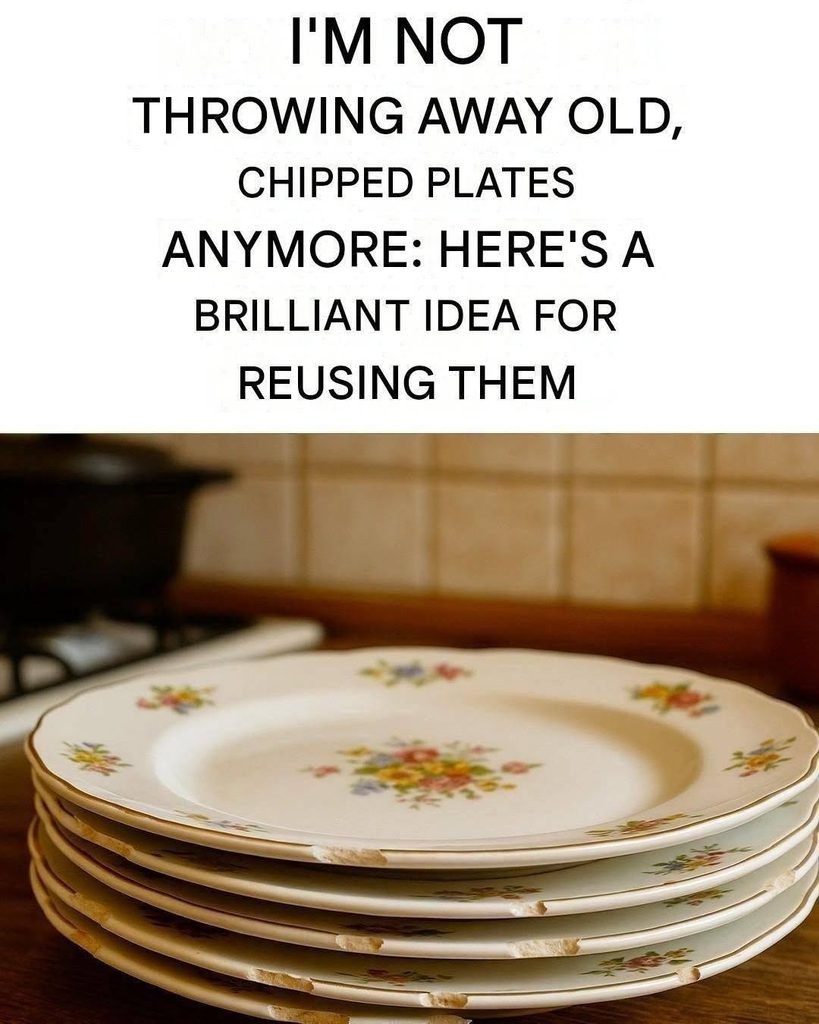
The image of the stacked, chipped vintage plates perfectly captures this dilemma. Instead of tossing them, the text proposes a “brilliant idea for reusing them.” That brilliant idea is to stop viewing them as compromised food vessels and start viewing them as premium craft supplies. With a bit of creativity, some basic tools, and a free afternoon, you can transform those damaged plates into stunning home decor, functional garden features, and beautiful pieces of art that will last for generations.
This comprehensive guide will explore the golden rules of upcycling ceramics, detail the absolute best and most brilliant ways to reuse chipped plates, and provide a step-by-step masterclass on the most beloved project of all: the mosaic garden stepping stone.
The Golden Rule: Safety First
Before you start smashing plates or gluing them to candlesticks, there are a few critical safety rules you must follow.
1. Retire Them From the Kitchen
Never eat off a chipped plate. The chip creates a rough, porous surface where microscopic food particles and bacteria can become trapped. Washing the plate may not remove these pathogens. Furthermore, older vintage plates (especially those made before the 1970s) may contain lead in their glaze. If the glaze is chipped, lead can leach into your food. All projects below are for decorative or non-food-contact uses only.
2. Protect Your Hands and Eyes
If you are breaking the plates to create mosaics, wear safety glasses and thick work gloves. Ceramic shards can be razor-sharp. Always wrap plates in a double layer of cloth or a thick bag before striking them with a hammer to prevent shrapnel from flying.
3. Sand the Edges
If you are keeping the plate whole to use as a spoon rest, jewelry dish, or wall art, use a fine-grit diamond file or a piece of sandpaper to gently smooth the chipped edge. This prevents accidental cuts.
The Brilliant Idea: Mosaic Art and Garden Stepping Stones
The most popular and visually spectacular way to reuse chipped plates is to turn them into mosaics. This art form, known as pique assiette (French for “stolen from plates”), was popularized by artists in the 20th century. It involves breaking the plates into irregular pieces (tesserae) and cementing them into a pattern.
Why Mosaics Are the Ultimate Solution
Mosaics are brilliant because they embrace the damage. Instead of hiding the chip, the plate is broken down completely, and the vintage floral patterns, gold rims, and vibrant colors are repurposed into a new, cohesive design. It transforms an accident into a work of art.
Project 1: The Garden Stepping Stone
This is the perfect beginner project. It is functional, beautiful, and helps you use up multiple chipped plates.
Materials Needed:
Chipped plates (various colors and patterns)
A stepping stone mold (available at craft stores) or a sturdy cardboard box
Quikrete (ready-to-use concrete mix)
A bucket and a trowel for mixing
Safety glasses and gloves
A towel or a heavy-duty bag for smashing
A hammer
A sponge and water
Step-by-Step Instructions:
Prepare the Mold: Place your stepping stone mold on a flat, level surface (like a sturdy piece of cardboard).
Smash the Plates: Place a chipped plate in a thick towel or bag. Put on your safety glasses. Gently tap the plate with a hammer to break it into pieces roughly the size of a quarter or a nickel. If you break them too small, you will lose the beautiful pattern. Set the pieces aside.
Mix the Concrete: In a bucket, mix the Quikrete with water according to the package instructions. You want the consistency of thick peanut butter or brownie batter.
Pour the Base: Pour the concrete into the mold, filling it about halfway. Tap the sides of the mold to release any air bubbles.
Arrange the Mosaic: This is where the art happens. Carefully press the ceramic shards into the wet concrete. Make sure the patterned side is facing up. Leave a small gap (about 1/8 to 1/4 inch) between the pieces for the grout. Work quickly before the concrete sets.
The Chips: Don’t throw away the actual chipped edges of the plate; they can be used to add texture to the outer rim of the stone.
Let it Cure: Let the concrete dry for at least 24 to 48 hours.
Grout (Optional): If you want a smooth finish, you can mix a small batch of sanded grout and push it into the cracks with your fingers or a grout float. Wipe away the excess with a damp sponge. Let it dry.
Project 2: The Vintage Tiered Cake Stand
If you have a chipped plate but a beautiful center design, do not break it. You can create a stunning, vintage tiered stand using a candlestick. This is a brilliant way to create an elegant centerpiece for a tea party or a chic jewelry organizer.
Materials Needed:
Whole chipped plate(s)
A sturdy glass or ceramic candlestick holder
E6000 Industrial Strength Adhesive or Epoxy (This is crucial; regular craft glue will fail under the weight of a plate).
Rubbing alcohol and a cotton pad
Optional: Small decorative knob for the top
Step-by-Step Instructions:
Clean: Clean the bottom of the plate and the top and bottom of the candlestick with rubbing alcohol. This removes any oils or dust, ensuring a strong bond.
Apply the Glue: Apply a generous layer of E6000 or epoxy to the top rim of the candlestick.
Attach: Center the candlestick on the bottom of the plate. Press down firmly.
Cure: Place a heavy book on top of the plate to apply pressure, and let it cure undisturbed for 24 to 48 hours.
The Second Tier: If you have another plate, glue it to the top of the candlestick. You can even stack multiple plates using different heights of candlesticks.
Finishing Touch: Glue a pretty drawer knob to the top plate to act as a handle.
Project 3: Rustic Bird Feeder
If the chip is on the rim, the plate can still function beautifully outdoors. You can create a hanging bird feeder for your garden.
Materials Needed:
Chipped plate
Heavy-duty macramé cord, twine, or wire
Scissors
Step-by-Step Instructions:
Cut three or four lengths of your cord (about 3 feet long).
Tie each cord securely to a different part of the plate’s rim. Make sure you tie them around the plate, not through it, so the plate stays balanced.
Gather the cords about 18 inches above the plate and tie them together in a knot.
Hang the feeder from a sturdy tree branch. Fill it with birdseed. The shallow shape of the plate is perfect for small birds to land on.
Project 4: Wall Art and Plate Walls
The Victorians loved the trend of hanging plates on the walls as art, and the trend has seen a massive resurgence in modern farmhouse and eclectic interiors.
The Display: A chipped plate can be mounted on a wall using a standard plate hanger (available at any hardware store). The chip can be turned to face the wall, hiding it completely.
The Gallery Wall: Mix chipped vintage plates with framed art, mirrors, and baskets to create a dynamic gallery wall. The varied textures and patterns of the plates add depth to the room.
Project 5: The Rustic Spoon Rest
If you are only dealing with one chipped plate, this is the easiest and most practical upcycle.
Materials Needed:
One chipped plate
Fine-grit sandpaper (optional, to smooth the chip)
Felt pads (optional, to protect the counter)
Instructions: Simply place the plate near your stovetop. When you are cooking, rest your messy spoons and spatulas on the plate. Because the chip is on the edge, it doesn’t interfere with the flat surface where the spoon rests. If you want to make it look more intentional, you can paint the plate with food-safe glass paint, or simply embrace the vintage character. Place small felt pads on the bottom to prevent it from scratching your countertops.
Project 6: Garden Plant Saucers and Water Catchers
This is a brilliant, zero-effort way to reuse multiple chipped plates.
Potted plants often leak water after you water them, staining your window sills or hardwood floors. Instead of buying plastic saucers, place your smaller terracotta pots on top of your chipped plates. The plate catches the water beautifully. Because the plates are often mismatched, it adds a charming, cottage-core aesthetic to your indoor or outdoor plant collection.
Project 7: Decorative Mosaic Tabletop
If you have a large collection of chipped plates and want a bigger challenge, you can mosaic the top of an old wooden side table.
Sand the tabletop.
Using tile adhesive, glue the ceramic shards in a radiating pattern (like a sunburst) or a random, organic pattern.
Once the adhesive is dry, grout the entire tabletop. This creates a durable, waterproof, and stunning piece of furniture that becomes the focal point of a living room.
Project 8: Drawer and Desk Organizers
If you have a desk or a nightstand with a shallow drawer, plates with small chips can be used as organizing trays.
Place a plate in the drawer to hold your keys, wallet, and sunglasses.
Use another to corral your rings and earrings on top of a dresser.
If the chip is sharp, simply sand it smooth. The vintage pattern looks far more elegant than a plastic tray.
Project 9: DIY Cake Stand with a Wine Glass
If you don’t have a candlestick, you can use an old, sturdy wine glass.
Turn the wine glass upside down. The base of the glass becomes the bottom of the stand.
Apply epoxy or E6000 glue to the bottom of the wine glass.
Press the underside of your chipped plate onto the glue.
Let it cure. The chip will be on the outer edge and barely noticeable, but the stand will look like a high-end antique shop find. Perfect for displaying cupcakes or fruit.
Project 10: Garden Markers
If your plates are severely smashed or you have small shards left over from a mosaic project, you can use them as garden markers.
Use a permanent marker or a Dremel tool to write the name of a vegetable or herb (e.g., “Basil” or “Tomato”) on a large shard.
Dig a small trench next to the plant and bury the bottom half of the shard, leaving the text visible. The ceramic shards are weatherproof and will last season after season.
How to Safely Break Plates for Mosaics
If you are doing a mosaic project, you need a reliable method for breaking the plates.
The Bag Method: Place the plate inside a heavy-duty zip-top bag or wrap it in a thick towel.
The Tap: Hold the bag in one hand and use a hammer in the other. Tap the center of the plate gently, working your way outwards. Do not smash it violently; you want to control the size of the shards.
Sorting: Once broken, separate the pieces by color and size. Discard the tiny, dusty fragments (or use them to fill gaps in the mosaic). Sand down any incredibly sharp edges.
Beyond the Plate: What About the Chips?
The actual chips that broke off the plates are often tiny and seemingly useless. However, if you are creating a mosaic stepping stone or a tabletop, you can use these tiny fragments to fill in the smaller gaps between the larger shards. Alternatively, you can crush them into a fine powder and mix them into your concrete for a subtle, sparkling texture.
The Environmental and Emotional Impact of Upcycling
When you choose to reuse a chipped plate, you are doing more than just saving a few dollars on craft supplies. You are making a conscious choice to reduce waste. Ceramics are notoriously difficult to recycle; they are heavy, they contaminate glass recycling streams, and they take up massive amounts of space in landfills.
Furthermore, upcycling allows you to preserve the sentimental value of an item. That chipped plate from your grandmother’s china cabinet may no longer be safe to eat Sunday dinner off of, but as a garden stepping stone or a tiered jewelry stand, it remains in your life. It tells a story. It turns a moment of carelessness (the drop that caused the chip) into a permanent, beautiful piece of home decor.
Conclusion: Embracing the Imperfect
The image of the chipped plates is a reminder that objects do not lose their value simply because they are no longer perfect. By embracing the flaws and seeing the potential for transformation, we can reduce our waste and beautify our surroundings at the same time. Whether you choose to create a stunning mosaic stepping stone for your garden, a vintage tiered cake stand for your kitchen, or a simple spoon rest for your counter, you are giving that old, chipped plate a brand new purpose. The next time you hear the sound of ceramic cracking, don’t reach for the trash can. Reach for your craft supplies, because the best idea for a chipped plate is the one you create yourself.
Frequently Asked Questions
Is it safe to eat off a chipped plate?
No. Chipped areas can harbor bacteria that are difficult to wash away, and the broken glaze can expose lead or other chemicals in vintage ceramics. Chipped plates should only be used for decorative or non-food-contact purposes.
How do I break plates for a mosaic without shattering them everywhere?
Place the plate inside a heavy-duty zip-top bag or wrap it tightly in a thick towel before tapping it with a hammer. This contains all the shards and prevents them from flying around the room.
What is the best glue for attaching plates to candlesticks?
You must use a heavy-duty adhesive like E6000 industrial glue or a two-part epoxy. Regular craft glue or hot glue will not hold the weight of the plate and will eventually fail.
Can I put a mosaic stepping stone outside in the winter?
Yes, provided you use the right materials. Use outdoor-grade concrete (like Quikrete) and make sure the mosaic is thoroughly dried and cured before exposing it to freezing temperatures.
How do I smooth the sharp edges of a chipped plate?
You can use a fine-grit diamond file, a piece of wet/dry sandpaper, or a rotary tool (like a Dremel) with a grinding stone bit to carefully grind and smooth the edge of the chip.
Can chipped plates be recycled?
Generally, no. Ceramics and porcelain have a much higher melting point than glass and can contaminate a batch of recycled glass. They are not accepted in most municipal recycling programs and should be upcycled or thrown in the trash.
What can I make with a plate that has a large chunk missing?
If the missing piece is on the edge, it is perfect for a spoon rest, a plant saucer, or to be hidden at the back of a wall display. If the plate is broken in half, it is ideal for a mosaic project.
Are vintage plates with gold rims safe for crafts?
Yes, they are safe for crafts. However, you cannot put them in the dishwasher or microwave, even after upcycling. If you use them for mosaic art, the gold rim looks beautiful and adds a touch of elegance.
How long does it take for E6000 glue to cure?
E6000 glue requires about 24 to 72 hours to fully cure and reach maximum strength. During the curing process, do not move the object or place heavy weight on it.
Can I paint over the chip on a plate?
Yes. For decorative plates, you can use enamel craft paint to cover the chip. Bake the plate in the oven according to the paint’s instructions to set the color. However, this still does not make the plate safe for eating.